Showing posts with label FO's. Show all posts

Saturday, September 19, 2015

NEW Knitting & Unicorn Tails

Over the summer, I spent a good deal of time designing (fun) (yet, challenging) and just knitting (always relaxing).

One day last week, I finished binding off the second of Mr K's 2015 socks, and I finally blocked that little shawl that I named Atmosphere, as well as my latest Paper Lanterns.  And then I realized that I really did need something NEW to knit!

Within 24 hours, I cast on two new projects (using other designer's patterns) (I still do that) (I learn from everything that I knit) (and, sometimes I like to just relax and knit with less of that "thinking" thing having to happen).

First, I cast on a project that I named Shirttail Pullover.  This will be a mostly mindless knit for me.

 Pattern: Tongshan Sweater by Kiyomi Burgin
Yarn: Classic Elite Yarns MountainTop Crestone

Then, I cast on a "Silkie Selkie" (a Selkie Sock made with Silkie Socks That Rock) but I was not happy with it.


In the photo above the cuff of the top-down Silkie Selkie sock is OK, but there is not enough contrast between the 'obsidian' and that 'dusk' blue, in Knitpicks Fingering Stroll.  Every sock that I made in the last few years has been a toe-up sock from my own Fingering Weight TATU Sock Pattern.  In this instance, I did eventually decide that I did not want to use this cuff-down pattern by another designer.  (I would have had to modify it by reducing the stitch count.  I found it a bit wide even on size 0 needles, and I refuse to knit with anything smaller than size 0.)  I am going to design a toe-up sock with a gansey type all-knits-and-purls stitch pattern and a band of Fair Isle at the top.

I will use my first skein of Unicorn Tails in 'antique lace' for the Fair Isle.

My purchase of a bundle of Unicorn Tails at Gosh Yarn It! was a bit of a splurge, but I know I will be using them here and there on many projects with great joy!  Hope all of your knitting is happy!  I'll be back soon.
  

Sunday, April 26, 2015

Round Two (& Three) FO's

FO photos...

Detail Petite Double Dutch

Petite Double Dutch

My Petite Double Dutch was knit with Isager Alpaca Merino 2 on US size 3 needles.  This yarn is finer than the yarn that I used for my pattern sample and I liked my swatch with the Isager knit on smaller needles.  The finished shawl is approximately 43" long and 9.5" wide.  This was my second Double Dutch.

Another Rosebud

My latest Rosebud was knit with baa ram ewe Titus , the same yarn that I used for the swatch that I sent to Interweave as a part of my design proposal.  This was my second Rosebud.


(Perhaps you will view this last photo with eyes that are kinder than my own.)  My sister shot this with her phone during our last meal (a very late lunch) in NYC.  I was wearing my third Paper Lanterns shawlette.

I did make all three from the same yarn and on the same needles.  Blue Moon Fiber Arts owns the original sample.  My sister was gifted with my second one for Christmas, and I finally finished one for me to wear in March.

In January, the rights to this design came back to me.  But as in most cases with third party publishers, I am not allowed to sell the Blue Moon Fiber Arts version of the pattern.  I am currently in the process of writing a version using my own template and with my own photography.  (Mr K took several dozen photos of me wearing the shawl last weekend.)  (I kept thinking that only a fool would use me as a model... but the good news is that I am getting better at photo editing.)

I will let you know when the pattern becomes available.  As always, thanks for reading and happy knitting! 

Sunday, November 9, 2014

Playground Shawl KAL Update

I am very grateful to the three participants in the Playground KAL who have finished their shawls and have given me permission to share some lovely FO images with you.


Nancy (americana) named her gorgeous Cat's Cradle "The River".  From Nancy's project notes: "The reason for the name, I just got back from the 1000 Islands, and we stayed right on the river!! Beautiful place:o)"  Her words brought back vacation memories.  I have been to the Thousand Islands very many times and I totally agree.  I can see a river in the variegated blue stripes. The colors in the shawl include a more vivid blue (Madeline Tosh's colorway 'shoreline') than what appears in the photo, but this shot by the window is my favorite image.  Thanks, Nancy!  Good work!


Lisa (lacotter) worked up this stunning Red Rover in a rich pink with dark gray Heritage sock yarn.  Her project, named simply "Red Rover Shawl", was made as a gift for her cousin.  From a post by Lisa in the KAL thread:  "I’m excited to send it to my cousin. She battled breast cancer several years ago and her favorite color is pink."  Truly, a beautiful way to wrap that cousin up in a great big hug!  Thanks for sharing, Lisa!


Sharon (seffy) aptly named her Cat's Cradle "Cradle of Tweed".  I always love a good tweed!  (Got to get my hands on some of that Geilsk yarn.)  Sharon said, "The bind off took forever it seemed!"  I think that you will agree that it was well worth the time, as was the washing and blocking!  Great job, Sharon!

Thanks again, Nancy, Lisa, and Sharon, you have done my patterns proud!

These knitters won free patterns for being the first three in the KAL to finish their shawls.  You still have time to join in the Playground Shawl KAL, which will conclude at midnight November 30.  Two of these lovely knits were made in less than the three weeks that remain.  There are several great prizes to be won at the end of the Playground KAL.

In my next post, I will be announcing another KAL and pattern promotion that I will be just a small part of... This will be HUGE!  Shhhh!  I cannot say anymore right now, but please come back on Wednesday for my next post.  Until then, happy knitting to one and all!

Monday, May 5, 2014

Bigger Stuff (the 2nd) -- In Which I Install Many Snaps

For as long as I have been blogging, it seems that every April-into-early-May finds me writing about FO's...

It is my own kind of spring cleaning.  While the house (and my yard) could both use a whole  lot more of my time -- each spring has me finishing up (or sometimes packing away for hibernation) my wintery knitting so that I can begin (or get back to) some springtime knit-work.


 Project Name:  Bernadette
Pattern:  Lauriel from Little Red in the City by Ysolda Teague
Yarn:  Trendsetter Yarns Merino VI

I feel that I have already said a whole lot about this project over the 368 days that it took to make.  See my project page for "Bernadette" over on Ravelry to read about all of that.  And then, if you like, a bit more, from the blog approximately one year ago.


The pattern called for snaps and buttons, though it did not specify spacing or sizes.  I chose to place a button and snap set between each rib, which is much closer than what it pictured in the book.  I did not want any pulling or gaps with the rather close fit of the cardigan.  My button choice is a smallish 5/8" diameter button with size 2 snaps.  There  are no gaps.  The effect reminds me of "snap tape", and I like that.

It took (what seemed like) a great many hours to sew on all (15) buttons and snap sets.  I finished this just before Easter.  I wanted to wear it for the holiday, but it was actually too warm of a day here.  I have worn it twice since then, yet I do not have a photo of me wearing it.

Happy knitting (and finishing) to you!  (Happy spring cleaning, as well!)
 

Friday, April 25, 2014

Bigger Stuff (1 of 2) -- In Which I Install a Zipper

There has been a gap.

My last post "Small Stuff" was on April 8.

"Small Stuff" was about a handful of smaller FO's that I made mostly in the first 3 months of this year.  In April, I finished some "Bigger Stuff".

I finished stitching the zipper into my Taiga #2 on April 12, 2014.  (I noticed when I entered this date on Ravelry that my finish date for the project was exactly 1 year after the start date.)


 Pattern: Taiga by Svetlana Volkova
Yarn: Berroco Blackstone Tweed Chunky

Some of you may remember that in my sleeve post on this project, I mentioned finding two different zipper insertion tutorial-type posts. I ended up using neither, but bookmarking them for the future.

The first, for me, has a great idea for pinning in a zipper -- but with a selvedge edge being attached to the zipper.  It does also show using a hand stitched back-stitch to actually sew the zipper in place.  This is the stitching method that I do use most often; however, I hate the way it looks on the inside of the garment, and I usually end up adding a facing of some sort to hide the stitches.  My Taiga #2 already had a folded front facing made from a partially steeked edge.  Pinning the zipper to a selvedge edge was in no way possible, but also out of the question, was applying any sort of additional facing to hide the ugly hand stitching.

The second zipper post was, surprise!, in Swedish, but do scroll down to see it translated into English.  Now this is a zipper insertion I love for not having ugly uneven hand-stitching show on the inside!  But, I could not see using it on my Taiga, because of the Taiga's bulk and a little bit because it would be so very time consuming.  I know that I will use this on another sweater someday.

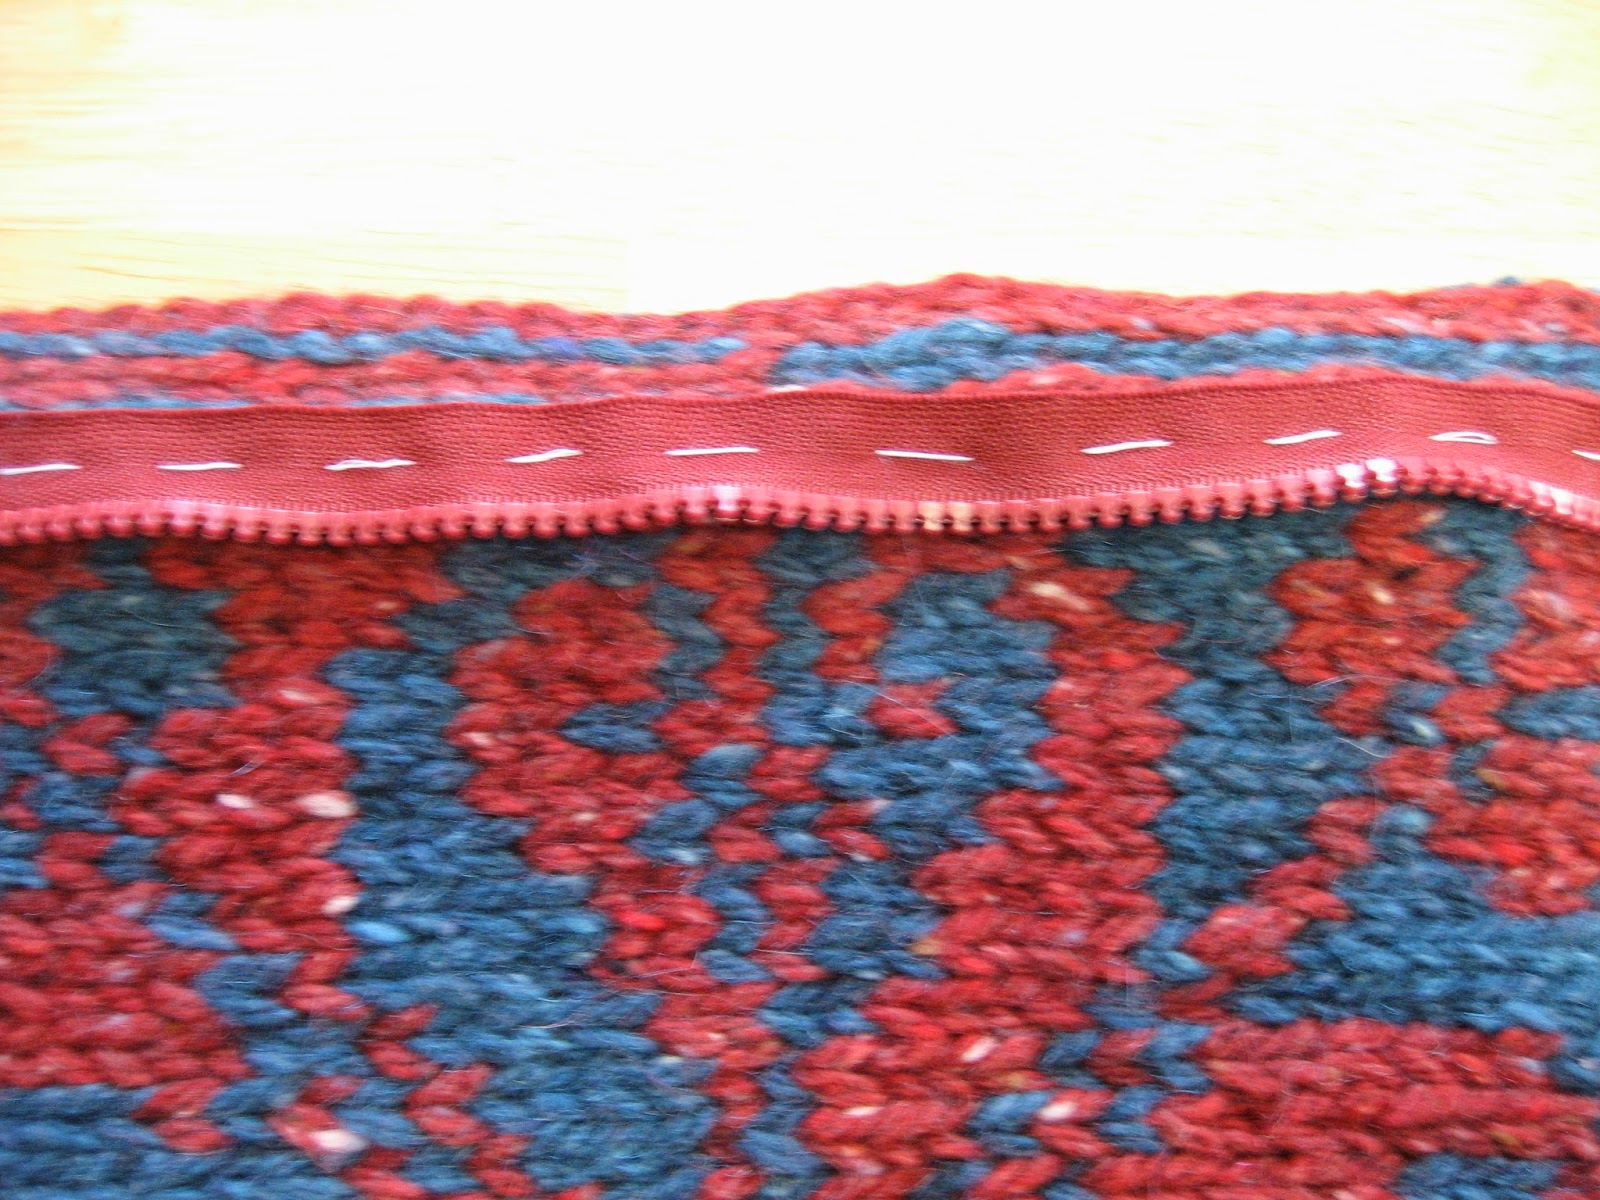
My final decision was to, surprise!, machine stitch the zipper in place.  Machine stitching with a thread closely matching the zipper color would certainly show the least on the wrong side.  First, I carefully replaced my "pin-basting" with a hand-stitched basting in contrasting white thread.

  
The white stitches were made exactly where the machine stitching would go through the knitting on the facing fold line.


I blame the bad lighting effect on my sewing machine light.

If you look very closely in the next photo you can see the cranberry color machine stitches.


After removing the white thread, I folded the facing back and sewed it  in place for the length of the neck ribbing, and from the lower edge of the sweater up to the top of the pocket facing.  Except for the yarn ends used at the very top and very bottom, I used the cranberry colored sewing thread so as not to add any more bulk.

A close-up photo may show why I like the stitching to look good on the inside.  If the top of the zipper is worn a bit opened, this stitching will show.


I consider my zipper application to be the best possible for this particular project.  A very important point I like to make about making (anything) is that what is best for one project might be very different from what is best for another.

Happy knitting (and finishing) to you!

Tuesday, April 8, 2014

Small Stuff

I have not posted about any of my FO's (finished objects) since right around Christmas.  All of the FO's in this post were the "small stuff" that I made as samples for teaching in February and March.

In January, I made my first Colormatic (from the free pattern designed by Michelle Hunter) as a shop sample in less than two weeks.  Ann at Gosh Yarn It! takes the best photos.

© Gosh Yarn It!

I taught the one-session class on February 1, and I made my Colormatic 2 for my lovely daughter as a teaching-project-in-the-works. 
I have a difficult time with indoor photos after dark, but this one is actually better than others that I have attempted.


Each cowl was made with four different colored skeins of "Kenzie" (50% New Zealand merino, 25% nylon, 10% angora, 10% alpaca, 5% silk) from the HiKoo by Skacel Collection, Inc.  A lovely, beautifully balanced yarn, and very easy to work with.  The class was well attended and great fun!

And then there were socks!  I do love teaching from my own patterns.  In March, I taught a three-session class in making a basic toe-up sock from my TATU Try A Toe Up) patterns:  TATU Sock and Fingeringweight TATU Sock.  The class created a perfect opportunity for me to both start and finish a pair of socks for Mr K (whose 'Sad Socks' are still quite that).


The yarn that I used was Cascade Yarns Heritage 150 Paints (75% merino, 25% nylon).  The fantastic 492-yards allowed me to make the tallest socks ever(!)  I rolled the skein into two equal-weight balls, and I knit the sock cuffs until I thought that they should not be any taller.  You can see that there was a decent amount of unused yarn in the remaining two balls (How opposite is that from those sad socks?)

I also made a second child's sock.  This photo shows a blocked and unblocked sock.  The blocked one was a part of the pattern photography.  The unblocked one a class sample.

 
I had a total of three in-the-works socks as I taught the three classes which focused on (1) the toe cast-on, foot and gusset, (2) short rows, and completing the reinforced heel, (3) my favorite toe-up sock bind-off (the Kitchener Stitch Bind-Off) along with alternate bind-off possibilities.

The sock knitters were a smaller but very enthusiastic group!  I hope to offer a couple more classes before summer.