THE THUMB & MORE.
We ended Part 2 with a slightly scary looking thumb hole. Please do not be afraid of the floats!
IF YOU ARE USING DOUBLE-POINTED NEEDLES... You will need to introduce another needle before you can knit in the round. I suggest that you place the first 5 sts from the lower needle on a third dpn.
IF YOU ARE USING TWO CIRCULAR NEEDLES YOU ARE READY TO GO. All photos will show the use of two circular needles, my own preferred needle type.
The first row of the thumb will be knit in color A. I suggest that you leave an 8-10" tail when you join A at the right side of the bottom stitches. (The reason for this will follow near the end of this post.)
THUMB
Rnd 2: With A, k9... these will be straightforward,
pick up 1 st between bottom and top of thumb... make sure that you create the new stitch by going below at least two strands of yarn,
Rnd 2: With A, k9... these will be straightforward,
pick up 1 st between bottom and top of thumb... make sure that you create the new stitch by going below at least two strands of yarn,
knit 9 sts for the top of thumb... ignore the floats attached to two of these... let them "float" behind your work,
pick up 1 st between top and bottom of thumb... once again, make sure that you create the new stitch by going below at least two strands of yarn,
– 20 thumb sts... Not so bad. Right?
Rnd 1: (Join B.) *With A, k1, with B, k1; rep from * to end...
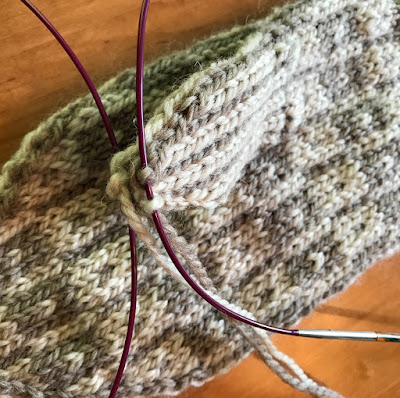
There is one more step to the afterthought thumb. More often than not you will have a hole on one or both sides of the thumb. If your holes are as noticeable as the one shown below, they will require a stitch or two to sew closed.
Usually you can use the tail that was created when you joined your yarn to begin knitting the thumb. (If not use a new piece of yarn and weave its end in to start.)
Turn the mitten inside out, and take little stitches catching just one yarn at a time.
Check the outside of the mitten before weaving in ends.
No more holes.
All that my mitten needs now is a nice bath. Stranded colorwork evens itself out beautifully after a gentle hand-washing. Use lukewarm water and mild soap, rinse, blot out excess moisture and lay flat to air dry.


No comments:
Post a Comment